

How To Build Custom Action Camera
Introduction: DIY Action Cam Macro Lens
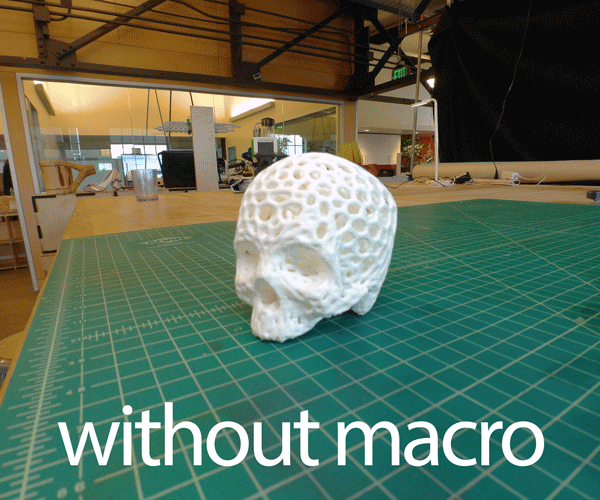
Activity cameras accept fish eye lenses so they tin get together the widest field of view possible. With a macro lens, you can use one to get closeups of minor objects with less distortion and more definition.
With a macro lens, the groundwork will be out of focus, so that the object you're trying to shoot takes center stage without whatever background distractions.
I've provided a Fusion 360 file that you can use to chop-chop and easily brand a custom adaptor for whatever action cam you have and 3D impress it.
Step one: Tools + Materials
- Fusion 360
- 3D Printer
-
I use a Prusa I3Mk3S for but about everything. It'due south the best bang for your cadet, in my opinion- very well fabricated, 3D printable replacement parts, accurate and reliable.
-
- 3D Print Filament
- I used BlackMatte Fiber HTPLA from Proto-pasta for this project, just pretty much any filament will work. This stuff is corking for this projection because it's important to avoid any kind of glare from the adaptor onto the dorsum of the lens. Any black filament will do, just this stuff having a matte finish will ensure that at that place are no reflections at all from a glossy surface.
- Macro Filter Fix: This is a 4-pack of 1X, 2X, 4X, and 10X lenses that will fit using the files I'm providing here (52mm). I'm using the +10 lens because the camera is super close to the subject.
- Action Camera: This design will work with the first 4 generations of GoPro, but I'm using an SJCam (works pretty well and is $90 on Gearbest with this coupon code: AFF1186).
- Calipers: These are as of import to a digital fabrication maker every bit a record measure out is to a carpenter. Yous'll need them for this project and most every other project I've posted.
Fusion 360 is complimentary and it's awesome. I use it for everything I pattern and fabricate.
Pupil / Educator License (renew complimentary every 3 years)
Hobbyist / Startup (renew free yearly)
Step 2: Using the Model
Follow this link to open the Fusion 360 file: http://a360.co/2zZrXTc
When it'southward open, become to Modify > Alter Parameters and make sure the "lensDiameter" parameter matches the diameter of your activeness cam lens.
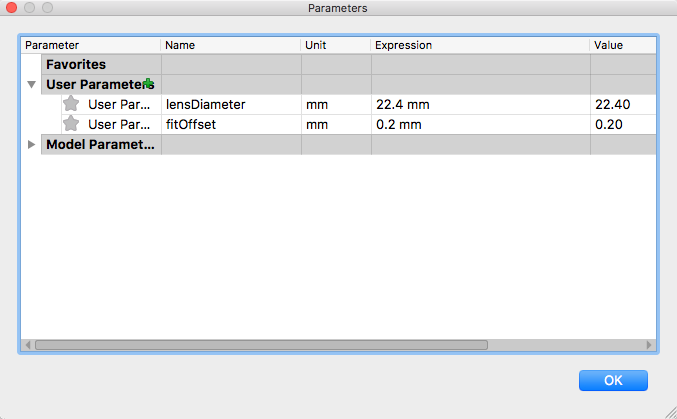
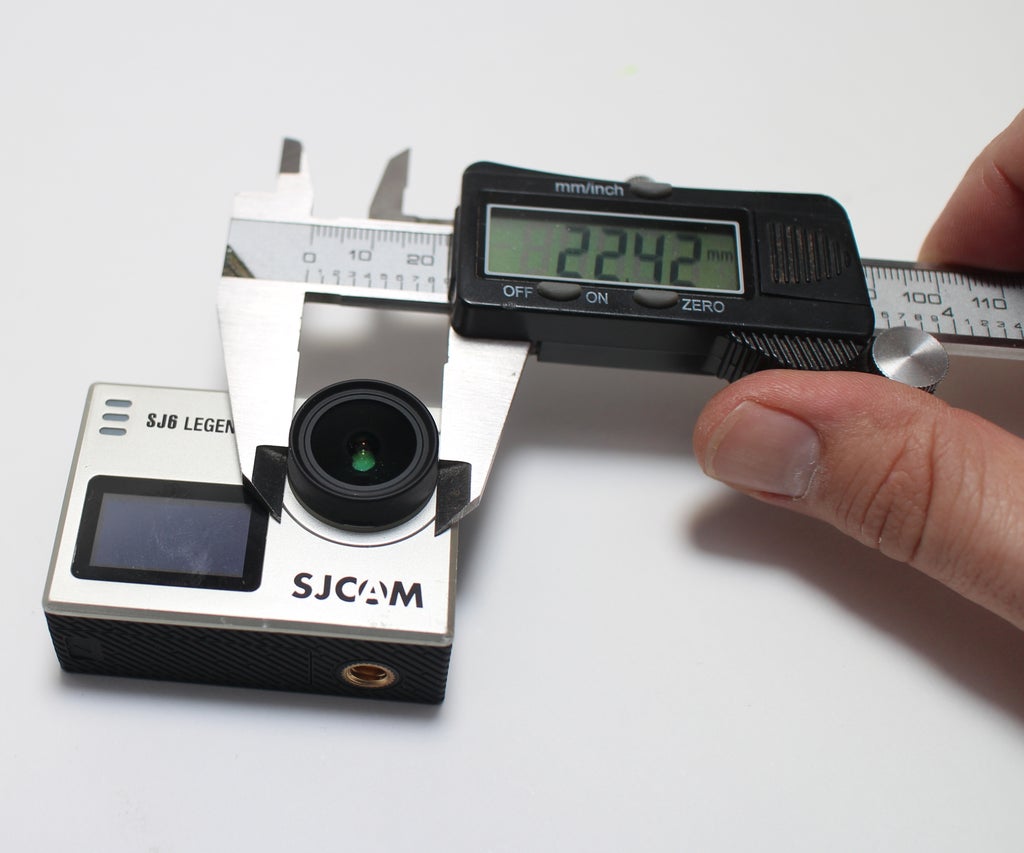
My lens is 22.4mm in diameter, but each camera model will probably be different. Use a pair of calipers to measure your lens diameter and enter that value under Expression in "lensDiameter". I usually stick to 1 decimal place when I use measurements of existent things because ane/100th of a millimeter is fashion out of the range of precision for merely about everything I make. Information technology helps to keep these measurements unproblematic so you lot can keep the projection in your caput more hands.
The other parameter in that location is "fitOffset" which is the tolerance. If you increase this, the fit volition exist looser, if you subtract it the fit volition be tighter. This takes a fleck of trial and error and it's unlike for dissimilar materials.
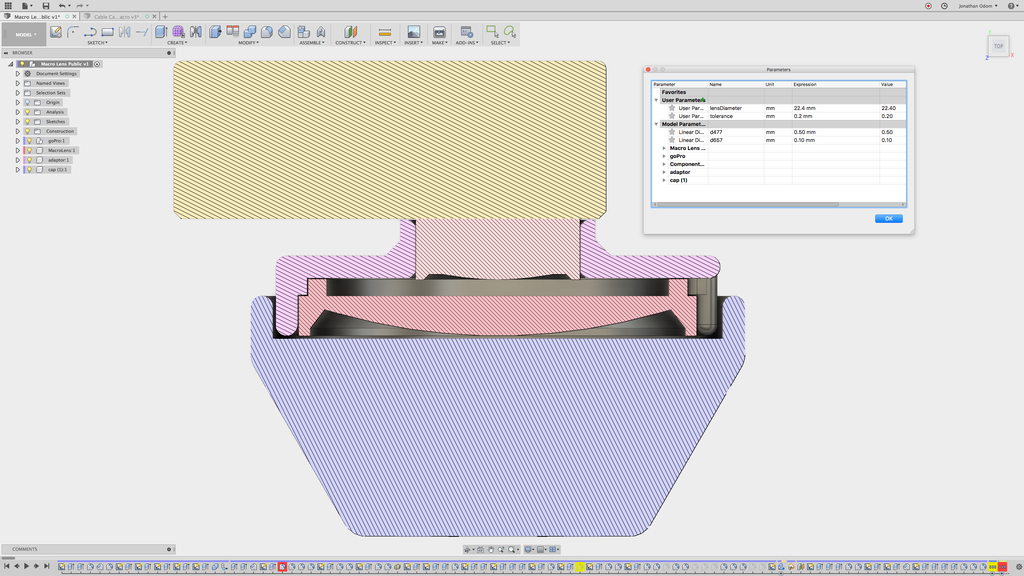
If you turn on the section analysis (Browser > Assay > Section), yous'll see a cross-section of the lens, adaptor, and cap. If you accommodate the parameters, you'll exist able to see the diameter of the adaptor change and the gaps between the parts change.
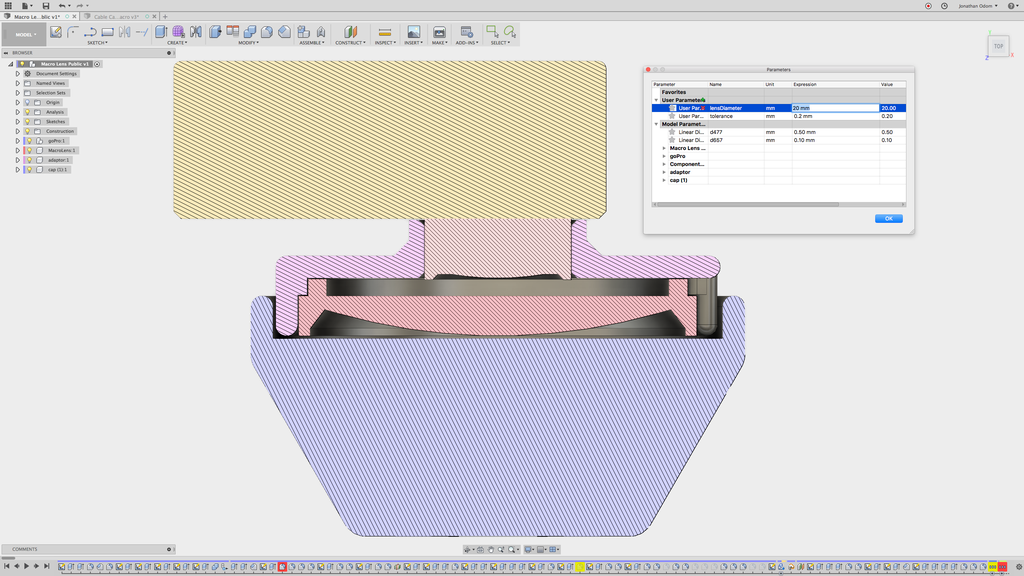
Here'due south an example where the lens is 20mm in diameter.

Here'south an example where the lens is 25mm in diameter.
Stride 3: Assembly
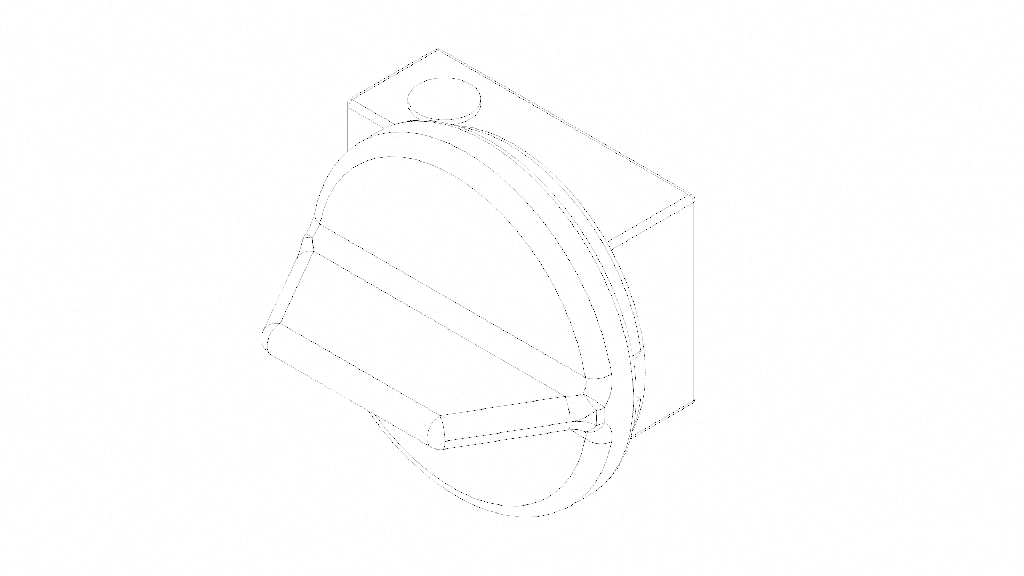
In that location's cypher to it. Just press-fit the lens into the adaptor and press-fit the adaptor onto the photographic camera lens. If the fit is too tight or too loose, adjust the tolerance parameter accordingly and print another version.
Footstep four: Get Some Time-lapse!
This macro lens is good for 3D printing time-lapses considering it doesn't distort the image so much and information technology puts all the background stuff out of focus.
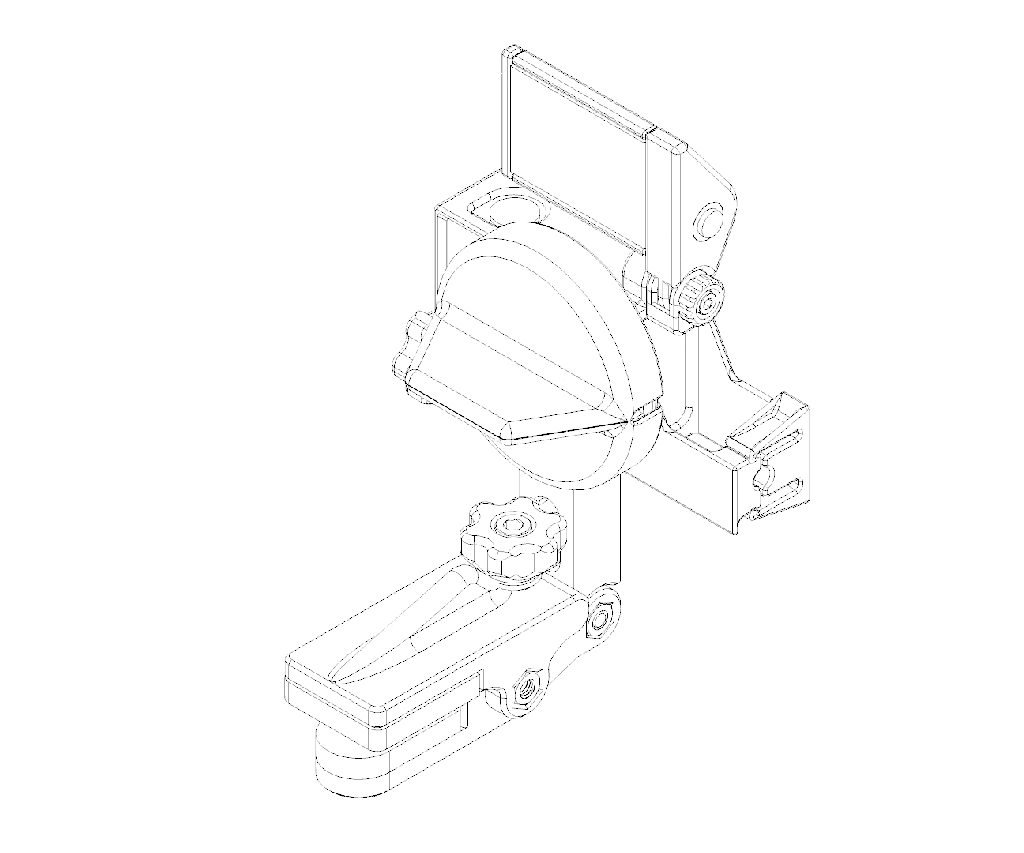
I'thou using my macro lens with a time-lapse rig I made that's pictured here. It's got a USB cable clip that takes pressure off of the usb ability jack and an LED grid for straight lighting.
Hither's a link to that Fusion file if you desire to print the parts and make your own, if there'southward whatever interest I might make an instructable on the assembly and electronics too: http://a360.co/2iWYPkf
Be the First to Share
Recommendations
Source: https://www.instructables.com/DIY-Action-Cam-Macro-Lens/
Posted by: christensenplousee.blogspot.com
0 Response to "How To Build Custom Action Camera"
Post a Comment